Showing posts with label Renovations. Show all posts

Wednesday, 27 April 2016

It's A Sign!

My sister and I have this thing about late night shopping on a Thursday night... 

The novelty of shopping at night I think stems from the fact that we grew up in a small town where everything shut at 5pm... 7pm at the latest!

Now although we are trying to make a conscious effort to reduce our spending.... and most of our renovations to the house are done on bare minimum expenditure I can't help but get a tingle of excitement when I get a 'SOS' txt from my sister saying a late night shopping trip is in order!

And here's the confession... we both love trawling the shelves of stores such as Target,, Kmart and Big W... OK so they're not the fanciest, but it's incredible what you can find, on special, and at ridiculously low price compared to the 'fancy' full priced designer stores!

For instance on our recent late night bargain hunt I fell in love with this black metal 'welcome' sign.


It is something that I would never pay full price for - but it seemed to keep calling out to me... as it sat dejected and lonely all by itself on the clearance shelf.

It needed a home... and I knew just where it could go!

And whilst I was umming and ahhinng about whether I really NEEDED this..

My sister swooped in to the rescue and decided to buy it for me as a belated 'house warming' present...

...and don't you just love it when something scans through at the checkout even cheaper than the sale price!  

This was on sale for $15 and we got it for $10!


I think Jeremy thought it was a bit weird when we came home with it - before it went up on the window - but now we both love how it welcomes everyone into the hub of the house... our kitchen!

And in the kitchen is another new addition... this black metal stool.


Again something we found on the late night shopping trip and something that I have been keeping an eye out for for the past 6 months or so.

We have a slight overhang on our kitchen bench and I have been on the hunt for a stool about 65cm high which will fit underneath it and still allow 'knee room'!


This is now a favourite spot to sit and eat breakfast... and a spot where we can sit and chat to each other about our day whilst someone is busy making dinner.

It's also nice to be able to have a spot for those informal meals on the go - or those meals alone when the other half is out for the night and it's just you!


Wednesday, 6 April 2016

Our Small Hallway Solution

Everbody has it... a small awkward space in the house that you just don't know what to do with!

For us it is our very tiny hallway which connects the two back bedrooms to the bathroom, toilet and through to the dining room.

Our house is fairly compact in design and this hallway area is no exception.  It must be only about 2m x 1m but it gets used a lot as a transition space!

The hallway was originally a mustard yellow colour but has since been tamed down a bit  to this beige colour called 'Light Rice'.

Last year one of my best friends came back from a trip to NZ with these awesome retro postcards which she has framed for me...and I knew just the spot to hang it!

The hallway with it's narrow wall was the perfect spot and from there the tone was set for this small space.


Next up for Christmas I received this beautiful dressing gown from my mum.  It looks great hanging on the back of the bathroom door and ties in with the funky retro feel!


And because the bathroom is quite tiny in itself - with nowhere for our towels to dry - Jeremy and I have taken a shine to these very handy 'over the door' hooks and we now hang our towels over the back of the bedroom door...  

Colour coordinated towels of course!


So this boring small space now has its own quirky style and has improved the view of this tiny space from the dining room through the wood and glass door...


It's the small things that count...and at the moment this is one of my favourite spots in the house!


Wednesday, 30 March 2016

Guest Bedroom Makeover Continues...


The last time we posted about this room we had taken the first step and bought a new duvet cover for in here.  Although I liked the leaf print and colours of it I kept looking at it and thinking...its just not quite 'right' yet!

So after a few weeks of staring at the bed everytime I walked past it (yes these kind of things really play on my mind!) I realised what was really bugging me was that there needed to be a darker colour on the bedding to 'anchor' the room, but I didn't want it a solid colour - (yes I am addicted to patterns!).  

Originally I wanted a dark blue paint for the walls in here but came to the conclusion that that would not look right and it would also mean we would have to buy new curtains... which we don't really want to do. 

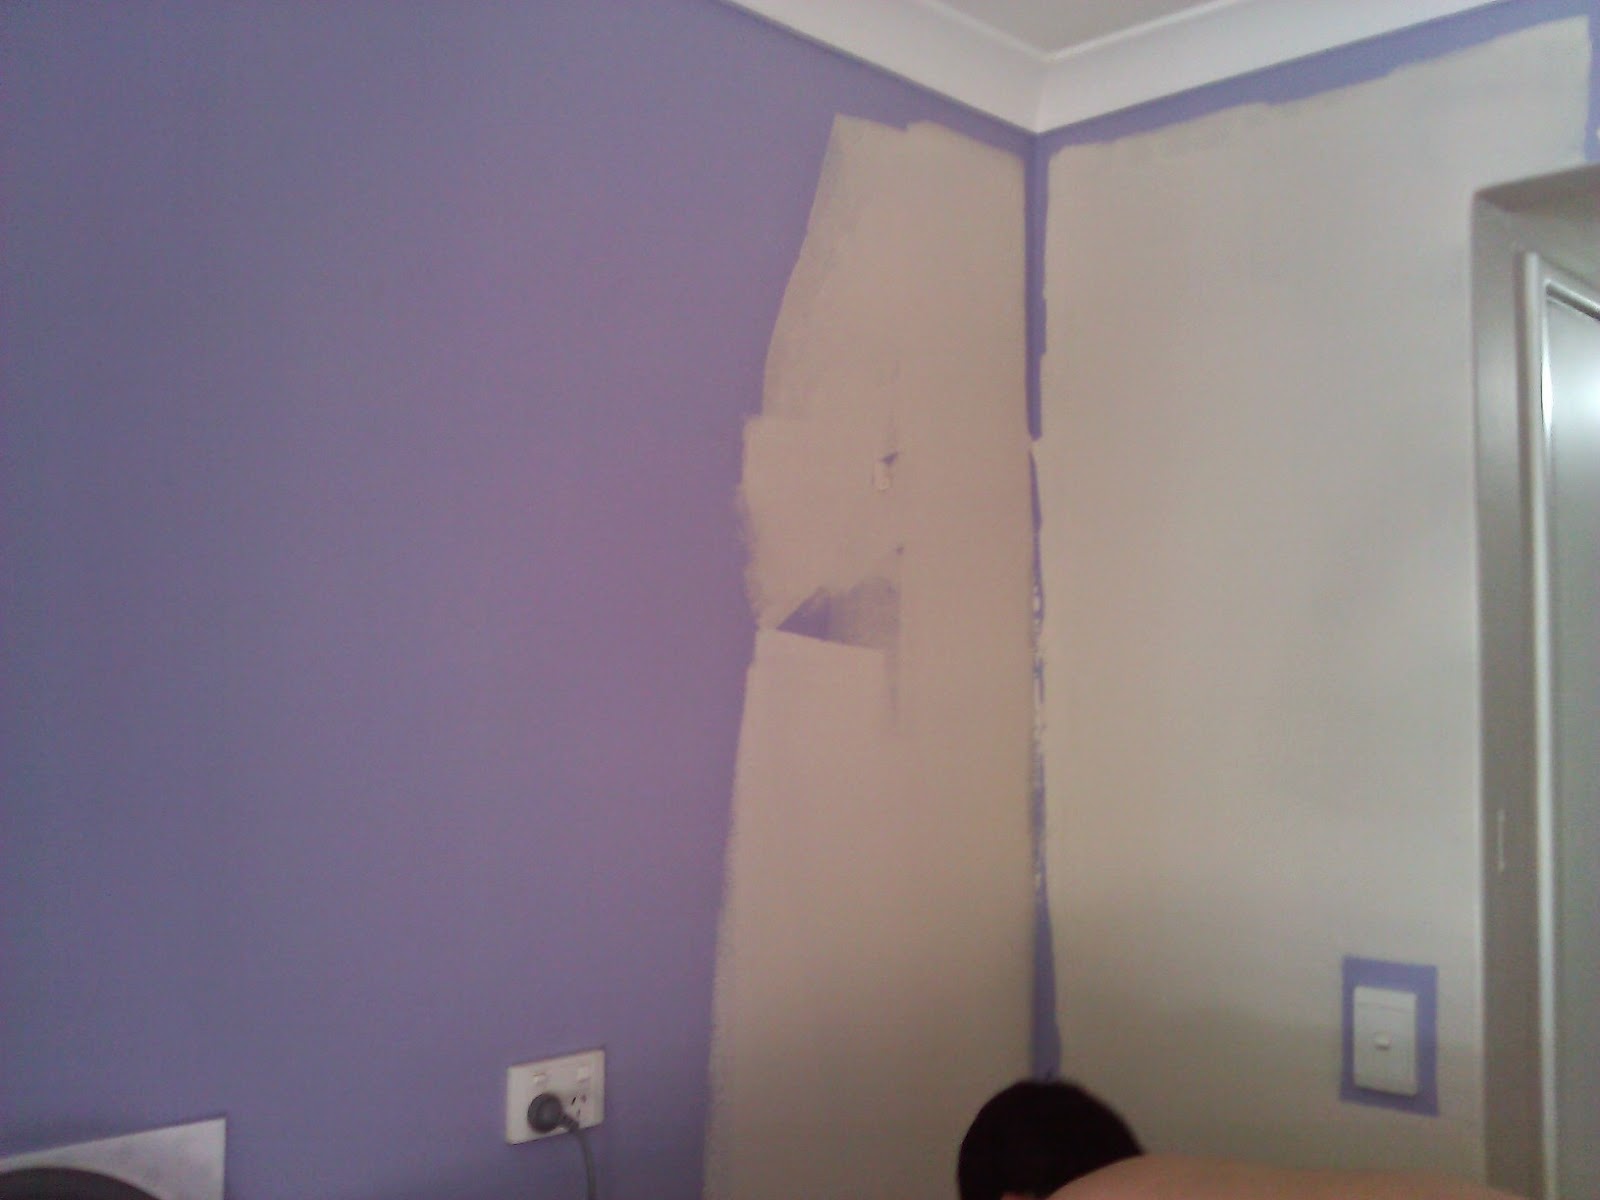
The purple colour is NOT staying... it has been our mission since the start of this blog to eradicate the house of this purple wall colour which the previous owners seemed to love so much!  You can see our test paint spot of a creamy white which we are considering in the top right of these photos.

So this is how the guest bed looks now...


And has anyone picked it yet?... yep the dark blue duvet cover I chose is the same one we have used in our master bedroom! I really love this pattern and I love that it is reversible (white with blue polka dots) which means you can style it different ways depending on your mood.


I love this canvas print of the beach too - and have taken inspiration from this and the colours from the bedding that this guest room shall have a relaxed 'beachy' feel which will be continued through to the ensuite.  I'm thinking white walls and tiles, with blue toned towels and timber features... 

But the ensuite and the painting of the walls in this room may not be tackled until Christmas...!

Saturday, 26 March 2016

Easter Reno Sneak-Peek!

We can't have the Easter long weekend roll around and not get our paint brush and roller out...so here's a sneak peek at what we have been up to today!

This is the room we currently use as our walk in dressing room - it is actually a single bedroom but we use it to keep all our clothes and 'stuff' out of our main bedroom.  

This is the 'before' shot of the wall colour... a light lilac purple was in this room...


Jeremy was sweet enough to move all the furniture out from the walls early this morning and prep the room...whilst I was having a sleep-in!

The colour we have chosen for this room is the same teal blue that we have used in our bedroom.  It's called "Santiago Blue" by British Paints.  We love the depth of this colour...and the fact that it's not purple!


The first coat went on really easy - we have learnt a few tricks from doing the other room such as rolling and cutting in at the same time to avoid too obvious a 'picture frame' look; and that the thicker the paint on the roller the better!


Today was rainy and quite a bit cooler so the paint was drying slowly which was great news for all those tricky cutting in areas such as the window.


Here it is the first coat on!  Love it!

Will post some completed photos once the second coat is on and furniture is back where it's meant to be :)

Tuesday, 12 January 2016

Final Touch To The Bathroom...

The bathroom mirror has seen better days - but we didn't want to spend much more money in here to buy a new one.  It just seemed a bit superfluous when it is only the edges of the mirror which are damaged.

We decided to investigate glass transfer film and found a frosted one at Clark Rubber for under $6/m.  It sticks onto the glass with water and is very easy to apply.

The tricky bit was cutting it to fit!

Before...

After...
Enhancing the mirror like this has really finished off this room nicely and the border makes the darker edge of the mirror look like a shadow line that is meant to be there!  Simple and cost effective and makes it look like new again. 

Completed bathroom!

We were initially very daunted by the challenge of tackling this bathroom, but now that it is done - we are both very proud of our efforts :)

If you can remember... it has come a long way since the yellow room we started with...


Friday, 8 January 2016

Starting On The Spare Bedroom / Office


Where to start in this room!?

Working from home the past year has meant that I have taken over the spare room as my office.  But there's still the guest bed in here.  The key to success in this room will be how we integrate the two functions in such a tight space.
  
To start off in this room we found a bed spread which caught our attention and is going to form the basis of the design in this room.  Originally I was quite keen to try a navy blue colour on the walls in here but have decided it would be too dark so incorporating the blues in the furnishings instead.

This room is still purple... as you can see in the photo but it is next on our list to paint.

The photo below shows the start of the change in this room... the white patch above the light switch is a test patch of the colour we are thinking in here, I'm not sure about it yet - it may be too white but you can see how good it is going to look once the purple is no more!


You can check out my 'lookbook' on Houzz HERE to see my inspiration for this room...

Wednesday, 6 January 2016

Christmas Break And We TackleThe Bathroom Tiles...

For the past month or two we kept looking at each other and stressing that the old tiles in the bathroom were past their best and going to start leaking water through to the back of the wall.

This has happened already in the en-suite which we have decommissioned for now until we have the time to sort it out.

The main bathroom really just needed some new silicone seal and a quick skim of new grout to freshen it up before it got to the point of no return!

On a trip to Bunnings we found a rejuvenating product for wall tiles so we grabbed a bucket for about $30 and decided to give it a go.

The original tiles had a grey grout which never looked clean and had some cracks in it.

Grey grout on the left, new white grout on the right.
It looks so much better white!


We are happy to put up with the slightly dated tiles - now they they look fresh and clean again!


Wednesday, 18 November 2015

Transforming the car-port to a patio area

We haven't been using the carport at our house because it's actually too short to fit the Ute in and be able to close the gates behind it.

When mum was over on holiday she suggested we could utilise the space by turning it into an outdoor dining area - because it is the one spot on the property with a view to the hills.

With this in mind I jumped at the chance to buy a second hand 8-piece outdoor dining set from one of my work mates who no longer needed theirs.  A bargain at $100!

All it needed was a quick hose down and scrub and it looks like new again.  Once in place it was off to Bunnings to buy 3m roll of bamboo to screen off the road a bit better and create some privacy - the bamboo won't last forever but at $16 a roll it doesn't matter!

Here is the result...


With mosquitoes being a bit of a pain this year I've got 3 citronella candles on the table and some citronella spirals for on the ground.  

Next step: invite some people over and start using it!

Monday, 7 September 2015

Still painting....

Bathroom: 2 coats Taubmans 'Crumb Cookie'
Toilet: 1 coat of the same


Think I will have to do 3 coats in each room, the off-white is struggling to evenly cover over the original yellow:

Amazing how white can make a bathroom feel like new!

Decided to bring the teal colour in from the bedroom in accessories such as the towels. So this wing of the house has a nice flow to it.  (refer to below post to see the completed bedroom).

Added a funky shower curtain and the bathroom space is transformed!

Monday, 31 August 2015

Bathroom Makeover Time!

On return from a recent holiday to Sydney we felt like we needed to get cracking on some more house renovations.

After staying in Hotels for a week you realise how nice it is when the bathroom is light and bright and clean.  Ours has always felt small and a bit dark and in need of a freshen up!

So yesterday we bought some bathroom paint from Bunnings.  We decided to go a lighter neutral shade than the rest of the living spaces and chose Taubmans 'Crumb Cookie'.  This is a cream colour with a base tone of brown so we are hoping it shall match nicely with the light beige colour we have used elsewhere.


First coat on and it has already made a huge difference!


Finishing the bedroom...

I had posted previously that the bedroom was finished, but I always felt that there was always something not quite finished about it!

Today I found a white, 100% cotton 'waffle' duvet cover for our spare duvet which we need for these winter nights.  I think it finishes off the room nicely!


I also added the cushions that I had originally planned for the room, I really love the mix of patterns, colours and textures.  For a master bedroom I think it has a good balance of feminine and masculine qualities.

What do you think?

Monday, 4 May 2015

Bedroom completed!

Everyone has been asking about what the finished bedroom paint colour looks like so here is the finished room!


At the moment we use the other bedroom down this end of the house as a walk in dressing room and wardrobe space.  We will paint this room the same teal colour so that they match.

The master bedroom at the front of the house has been converted to an office and guest bedroom space.  We will paint that to match the rest of the living space in the house - eventually!

We spent Sunday afternoon doing some repairs to our front fence, we would love a new fence but until then we have made an effort to tidy it up (and straighten it up!) so it looks a bit  nicer from the street.  Will put photos of this up soon!


Wednesday, 8 April 2015

Bedroom Makeover

Easter weekend - we probably should have done more than we did with respect to painting and house up-keep but after a hectic month of March we decided we needed some rest too!

But the bedroom was next on the list and we were wanting to at least get one coat on the walls to see what the colour we had chosen would look like.

Just like in the living areas we decided the colour by pinning up a selection of sample chips and then eliminating them one by one until we got to the final one, "Santiago Blue" by British Paints.  

So on Saturday we headed off  to get our paint and a few extra things we needed to get started on the painting again...a new roller, paint tray, and...more pots for the garden!

When the guy showed us the paint after he had made it up, I though it looked too light, but I was assured it would dry darker.  In amid the Easter weekend madness at the shop we took the pot without any more questioning, got home and slapped some on the bedroom walls.

But no matter how many different walls we painted it on we were just not convinced that it was the correct colour.  Instead of a deep teal colour it was bright blue, almost like it had no green or black in it.  perhaps good for a kids playroom, not so good for a bedroom!  A bit disappointed we had to wait until Monday to go back and sort it out.

So back to the shop on Monday and they figured out that unfortunately we had been given the wrong base, and that was why it had been bright blue!  So they gave us a whole new can with the correct base this time and we were on our way - except now it was Monday - back to work Tuesday!

Despite this we got the first coat on before tea time.  It is definitely more like what we were expecting.  The photos show the first coat and you can see it is going to be difficult to get an even coverage as we have found the paint to be a lot thinner than our previous one.  Also we learnt quickly that Jeremy needed to be on the roller and Sarah cutting in simultaneously to avoid the 'picture frame' effect - which seems to be a lot more prominent with the darker colour.

So if you remember what the bedroom looked like before (with our awesome new curtains)...


...and the bright purple walls!


...and this is it now with one coat...and the new bedspread!


You can see the purple still showing through, and the roller marks so I wouldn't be surprised if we have to end up putting 3 coats on to get it even, and dark enough.

At least its on its way now!

Sarah also managed to paint the adjoining toilet room this weekend.  From mustard yellow to "White Rice"  it definitely makes the room feel fresher and bigger.


Friday, 30 January 2015

Bedroom Mood Board

Mood Boards or Inspiration Boards are a great way to communicate design ideas.  
 
This is one I've compiled for the bedroom; teal, navy and white with a pop of aqua blue. 

 
I have bought the bedspread, and we have both decided the teal colour that we like.  Just a matter of painting and then having fun bringing it all together!

Sunday, 11 January 2015

Block-out Curtains for the Bedroom

The back bedroom is the coolest and quietest bedroom of the house and we have been using this as our room particularly for summer in this crazy heat!  However it only had a vertical blind which means the early morning light comes in and it’s very bright – not conducive to sleeping in at all!  We had been using a blanket hung up with bull-dog clips to help block the light but it was never to be a long term solution!


So block out curtains have been on our list of things to sort out for a while now, but curtains are quite expensive and difficult to find in the correct colour, length and style. 
However on an impromptu shopping mission to Ikea…(who knew you could spend 4 hours in Ikea!?!)…the perfect curtains were found, and with 50% off they were a bargain!


Thank-you to Jeremy for his patience and excellent handyman skills in getting the curtain rail up and level!  Why are curtains never straight forward!?

We chose to fit the curtains so that they are over-sized for the window and extend almost the full width of the room.  This creates quite a dramatic backdrop to the bed and prevents any light sneaking out from the sides.


We are thinking of painting this room a dark colour, perhaps a teal-blue, and then maybe get some new white bed linen to give it some luxury!

I have started using the Houzz widget (to the right of this post titled ‘renovation inspiration’, to get a collection of ideas for this bedroom and the rest of the house.  Click on it and have a look!

Monday, 5 January 2015

Passage/Foyer Painted

We have a tiny passage/foyer which joins the two back bedrooms, bathroom and toilet to the dining area.  It is separated by a glass paneled door.  The foyer, bathroom and toilet were a mustard yellow colour - very bright!


Whilst painting the dining and kitchen areas we also quickly got 2 coats of Dulux White Rice on this small area too. It has really helped lighten up this zone and there is probably not much more we will do in here.

Voila!


Sunday, 4 January 2015

Kitchen, Dining and Laundry painting done!

It is amazing how much you can achieve during a 2 week Christmas holiday.  Along with multiple family dinners, bbq’s and outings we have successfully finished painting the kitchen, dining and laundry areas.

It has been a hot 2 weeks too, so the painting has had to happen either early morning before 10 am or in the evening.  The first day we painted in the heat we both struggled with thick sticky paint and fumes so we quickly learnt our lesson with that one!

First off we got a full first coat in the kitchen and dining area.


The laundry was the same dark purple as the kitchen was originally, and underneath the purple is lime green paint which was discovered during sanding. 


It’s actually quite a large space for a laundry and we will be looking to utilise it a bit more efficiently with some storage ideas in the weeks to come! It would be good to get a door between the kitchen and laundry too, or even some kind of sliding screen which could still let some light into the kitchen, just to help hide the washing machine and ‘stuff’ that always seems to accumulate in this space!

We had an idea part way through painting of making a feature wall of some sort for the kitchen.  We settled on the idea of a chalkboard wall – something a bit fun and interactive.  I think because we were used to bright purple, the full coat of beige felt a bit, well beige (!).  


To get a nice smooth finish we sanded over the wall again to get rid of the bumps and then put 2 layers of Dulux Chalkboard paint.  The paint is quite thick and the initial coat was quite sticky and difficult to roll on.  A lot of paint was also used up just getting a full coverage on the roller, so for the second coat we used a brush which helped get the paint on more evenly.  It takes 48 hours to harden so no chalk drawings yet!


It feels really spacious and more inviting in this area now and we have moved the table so that we can easily sit 6 people around it - and still walk either side. 


A big transformation, a big job, but definitely worth doing!

(remember what we started with only a few months ago.........